Over at gundigest.com,
Step One – MOVE!
Self-defense situations are highly fluid. The bad guy is probably moving towards you. His pal or pals may be moving around you. You may be moving at the time of the attack, either towards your attacker(s), away or sideways. You may have someone with you, maybe multiple friends of family members, who may move God knows where. There may be moving bystanders, too. Cover or concealment could be . . . anywhere.
Whether or not you can successfully engage a lethal threat depends as much on geography as it does on the speed or quality of your draw. But one thing’s for sure: a moving target is harder to hit than a sitting duck. Or a deer caught in the headlights of a violent assault. Immediate movement is absolutely critical to your survival before, during and after an assault. The second you detect a lethal threat, MOVE! Unless you’re going to move forward to assault your assaulter, create as much distance between yourself and your attacker(s) as quickly as possible.
A foot can mean the difference between life and death. Before or AS you reach for your gun, get your skates on (as the Brits are won’t to say). Where you go depends entirely on your environment. But drawing and moving at the same time offers you a greater chance of doing something effective – finding cover or concealment, avoiding a knife thrust, getting your gun out – than simply standing still, drawing your gun and shooting at the bad guy (which, admittedly, can also be effective).
Common sense, right? Find me a YouTube video on drawing from concealment that shows the instructor moving. I can wait.
Step Two – Draw Your Gun
Notice the last recommendation on the list of possible defensive reactions: getting your gun out. If someone’s right on top of you – and that’s a highly likely scenario – drawing your concealed carry handgun is going to be extremely difficult, if not impossible. Bringing it to bear on the bad guy, equally so. That’s why Michalowski recommends a four-step draw: it gives armed self-defenders an opportunity to fire at a bad guy at close range as soon as practically possible.
That’s all well and good, but moving to create enough distance to draw your gun without interference to achieve a “proper” firing position is an even better idea. Anyway, neither approach is mutually exclusive and both techniques depend on the critical variable: removing your gun from concealment. Don’t kid yourself: it ain’t easy as it sounds. Wardrobe malfunctions don’t just happen to large-breasted entertainers; under the stress of a defensive gun use your clothing may suddenly decide to work against you.
Drawing your pistol quickly, without fumbling, depends on a practical carry system (i.e., the type and placement of your holster), which may depend on what you’re wearing at the time of the attack. For example, I carry my Wilson Combat 1911 or GLOCK 19 outside the waistband, concealed by a polo shirt over a Tommy John T-shirt. On the rare occasions I wear a suit or dress shirt, I carry a Kahr PM9 or Smith & Wesson 642 in my front pants’ pocket. I can draw and aim my gun in about a second, while moving. When open carry is legal in Texas, that’s the way I’ll roll.
Yeah, it’s that important. As most defensive gun uses end without a shot fired, getting your gun out of concealment quickly is likely to be more important than your marksmanship. Which is why you should practice drawing your gun from concealment as often as possible. Good news! You don’t have to go to a gun range to do it. Simply wear what you would normally wear, unload your everyday carry gun, safety check that bad boy, put it in your holster, pretend to be doing something innocuous and . . . draw!
[NB: Point the gun in a safe direction and do NOT pull the trigger. Given that a drawn gun may stop an attack without a shot fired, you don’t want to get into the habit of drawing and shooting automatically. Also, the situation can change between the moment you draw your gun and the moment you take aim.]
Step Three – Move And Shoot! Or Not.
I know: shooting isn’t drawing. Or is it? Is hitting a ball part of swinging a bat? You could practice swinging a bat without hitting a ball – but that would only take your bat swinging skills so far. Same goes for drawing your gun. To ensure a successful draw you need to link it to your shooting skills. Especially when you consider the fact that you should be moving as you shoot.
So move, draw, shoot. Actually, move while drawing and then shoot while moving. That’s how you get away from the bad guy to cover or concealment and provide a lead-tipped disincentive for further attack. Saying that, as I said before, sometimes it’s best to move towards the bad guy(s). There may be no cover or concealment, and accuracy is a function of distance (the closer you get the harder it is to miss.) But the bottom line remains: move, draw, shoot.
And there you have it: three steps for drawing your concealed carry pistol. There are plenty of skills you can add to the mix – from mastering a Michalowski draw to performing “combat reloads” on the fly. But if you don’t move (a.k.a., “get off the X”) and get your firearm into the fight quickly the fight may be over before you even touch your gun. You really don’t want to be that guy.


It’s hard to move and shoot accurately at the same time and it requires a lot of practice. So, practice. I used to shoot at a range where I could do that, but no more. That’s too bad, because shooting on the move is a highly perishable skill.
Amen to that. I did a move and shoot carbine drill that I haven’t done in a few years this weekend. I will be renaming that drill “pride check”. It was a humbling experience.
Hey, Mr. Farago,
Was this supposed to be tips for beginners, or is it about your $40 undershirts and high-end 1911?
Well, 5.11 and Under Armor make nice undershirts, too. And the $5.97 undershirt I got from Walmart work fine, too. It’s not like Glocks of all flavors aren’t popular and relatively cheap CCW guns.
Until recently I haven’t had access to an outdoor range since 2012. First time out was a sobering experience. Instead of shooting my usual 90+%, I absolutely sucked. Second time out I shot about 50% on a small target. That’s probably not all that bad since the target size was about 1/2 Q-bottle. Basic range was 15 yards. I did lateral movement and advance/retreat. To my surprise it was easier to be on target opening up the range than closing.
+3
Getting off the X is one of those things that is glaringly obvious when you think about it, but that you have to practice, practice, practice . . . and then keep practicing.
First, he needs to conceal it. Maybe re-title to, “Tips for drawing your open carry pistol”.
Yeah, couldn’t help but notice that, Funny a professional would make a mistake like that??
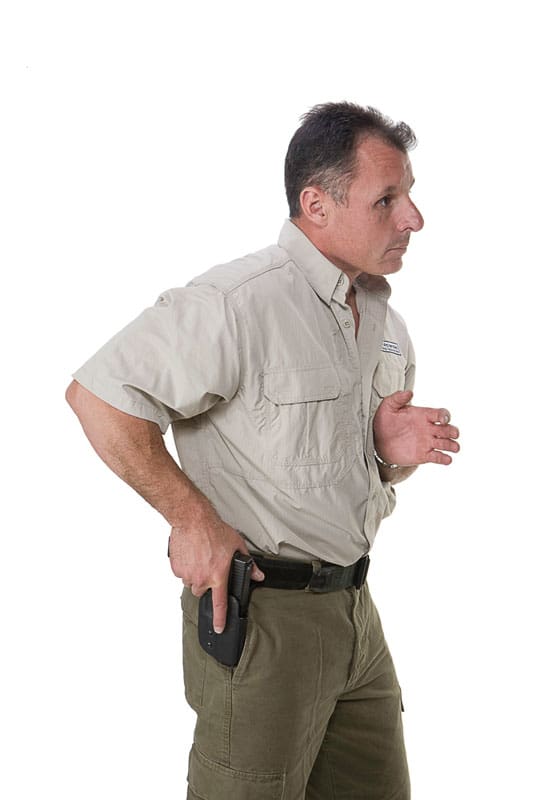
That picture is of Erik Lawrence, the author of the Tactical Pistol Shooting book he mentioned. It was one of the first books I read when I joined the world of concealed carry. Interesting book, some nice information, written by a guy who has spent time in some “interesting” places of the world on both the government and private dime.
uh, the gun in the pictures isn’t concealed.
it’s a lot easier to draw from an unconcealed OWB holster than most concealed options.
The picture is of Mike Pannone. I’d take my instructions from him. Period. Google it.
Apologies – I thought it was Lawrence. It’s Mike Pannone? You’re right – Lawrence or Pannone, they have solid knowledge in the BTDT world
That is 100% Mike Pannone, I’ve taken a few of his course. Like srw123, just google him. He’s an excellent instructor with very good courses.
Pocket carry? Train as you carry. Coat pocket carry,train as such.
So this thread talked about what you need to do before, while, and after you draw from concealment. It said nothing about HOW to draw.
Drawing from concealment quickly and reliably (without problems due to “wardrobe malfunctions”) is much harder than it sounds. There is a right way and a wrong way to do it, and it is different based on your carry method and your cover clothing. Talk about that for awhile, Robert Farago.
It should have been about how to clear your cover shirt with your cross hand and then clearing leather to engage the threat immediately.
Fight to cover or flee to cover is a big difference, which is negated if you have situational awareness.
I have been in some fights and if I would have run to cover, instead of dropping to my knee and firing I would be dead.
Running away and firing over the shoulder is a good way to shoot yourself in a panic. If you are surprised by a criminal do you really want to take yourself out of the fight by tripping over something as you flee.
Stand your ground and use judicious marksmanship with swift violence of action.
Shoot first and make the crime scene look like what you say. It is not what happened it is what can be proven.
Yeager doesn’t draw his handgun without moving. He teaches a movement step before addressing malfunction, an additional step when reloading, etc. Several instructors do this, but he’s relatively famous (infamous) and does it. Not hard to find at all.
I have given this some thought overnight and have some observations. As a corollary to movement don’t stop. To transotion from stationary to movement takes time. If you are at rest when the attack starts at close range a competent shooter will drop you before you take two steps. You can’t beat physics. So when you must stop be aware of what is around you. Look and listen. The other thing to remember is that movement throws off your attackers aim only if your attacker bothers to aim. Your typical mugger probably isn’t that good and will just point the gun in your general direction and empty the magazine. At short ranges you could possibly step into your attackers spray pattern. Movement is important but it isn’t a sure fire way to reduce the probability of getting hit.
I also take exception to Robert’s assertion that you should close with your attacker. You always should be looking to escape. The only time it makes sense to close is when your attackers blocks your only escape route. Distance equals time and time is your friend. Unnecessarily, reducing your time and decision space is not the way to win a DGU. Your objective is to survive and let the cops finish the job. If you can escape with no shots fired you win 100% of the time.
But, but, but, he’s open carrying in the picture!? What a showoff, he’ll get ambushed because guns are a criminal magnet. He’s just a neckbeard who wants attention and will ruin our chances for any gun rights restoration even though it’s people like him that are the only ones taking back any ground or making any progress…
I get off on having a government permission slip to sneak around with a secret gun! I’m so 007. I prefer to bait ain incident where I get to grab my gun and point it at someone, and possibly discharge rounds in a public place! It’s like, totally an advantage of some kind,I swear! I always conceal because when I whip it out and show them who’s boss, they’ll run away, I probably won’t even have to shoot them because just seeing my gun will scare them off!
Oh wait…
Anyway…
I was expecting something more useful… Like be careful not to grab the trigger as you panic… I make a point of drawing my PT738 by putting my finger BEHIND the trigger so I don’t shoot myself in the leg as I pull from deep cover in less than ideal circumstances…
Comments are closed.